3D rotating animation basic explanation
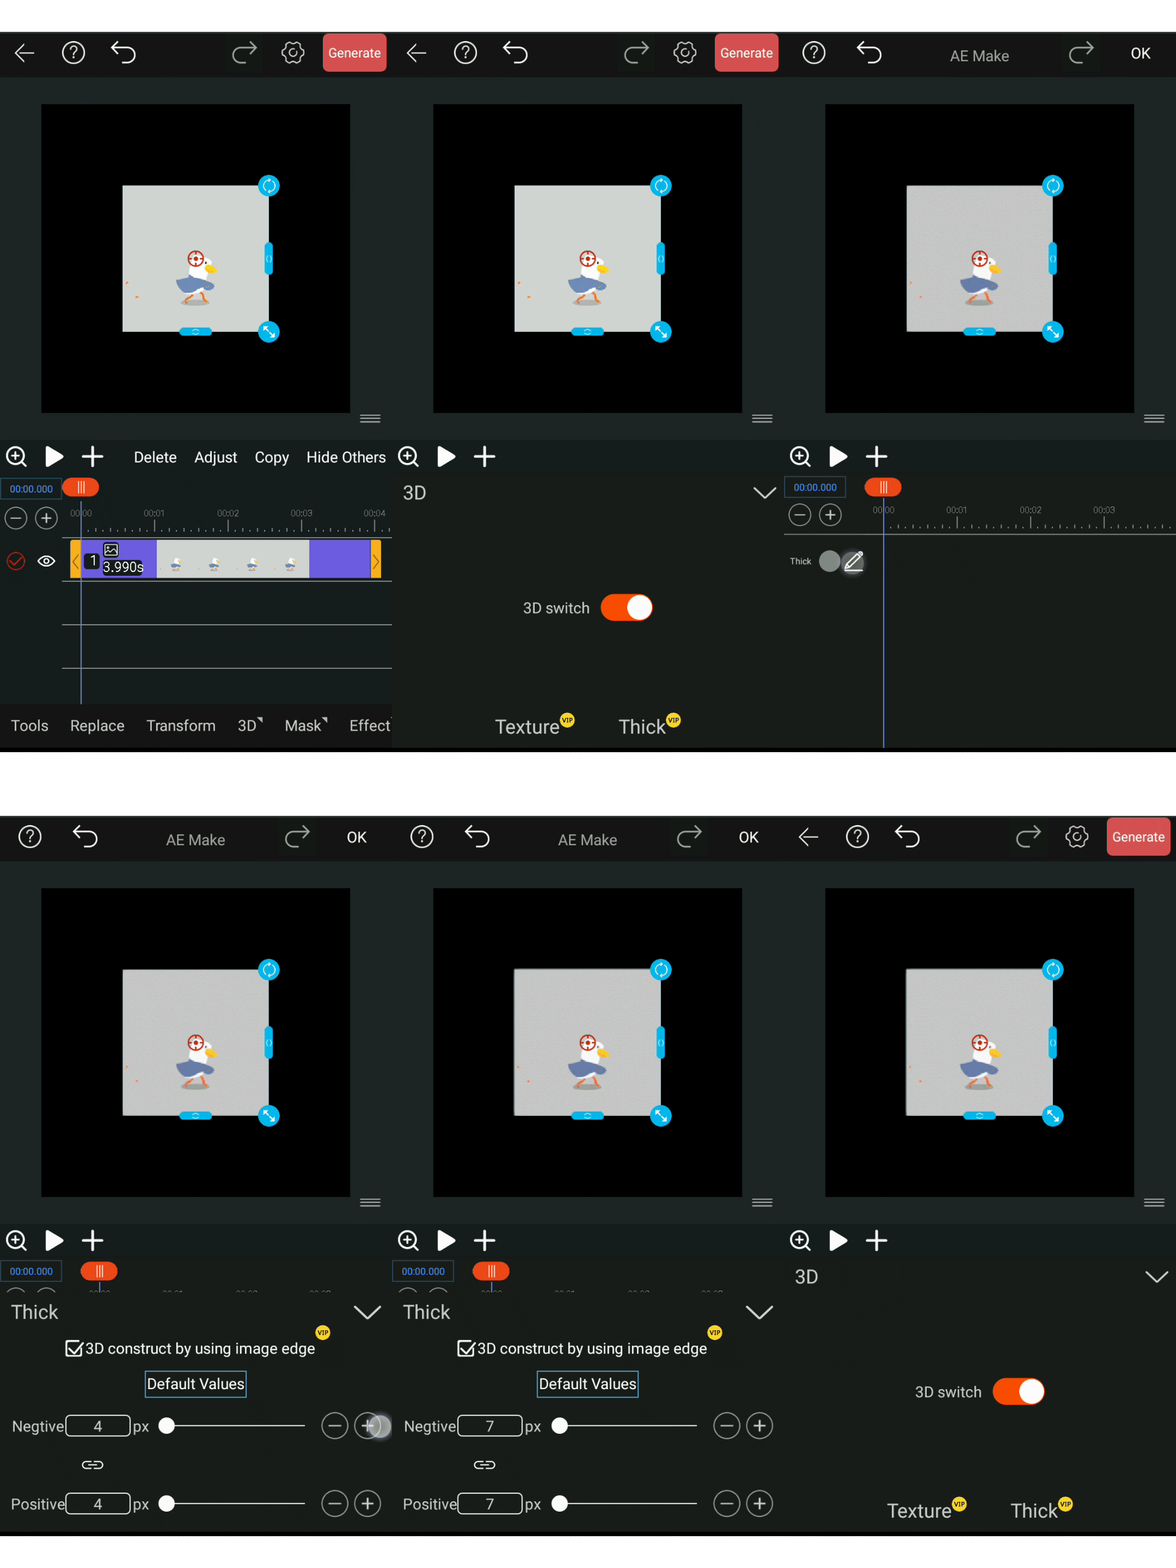
Let's open an image first and select it. Then we turn on the 3D switch and add thickness to the layer. (Here I set the number 7 as a demonstration)
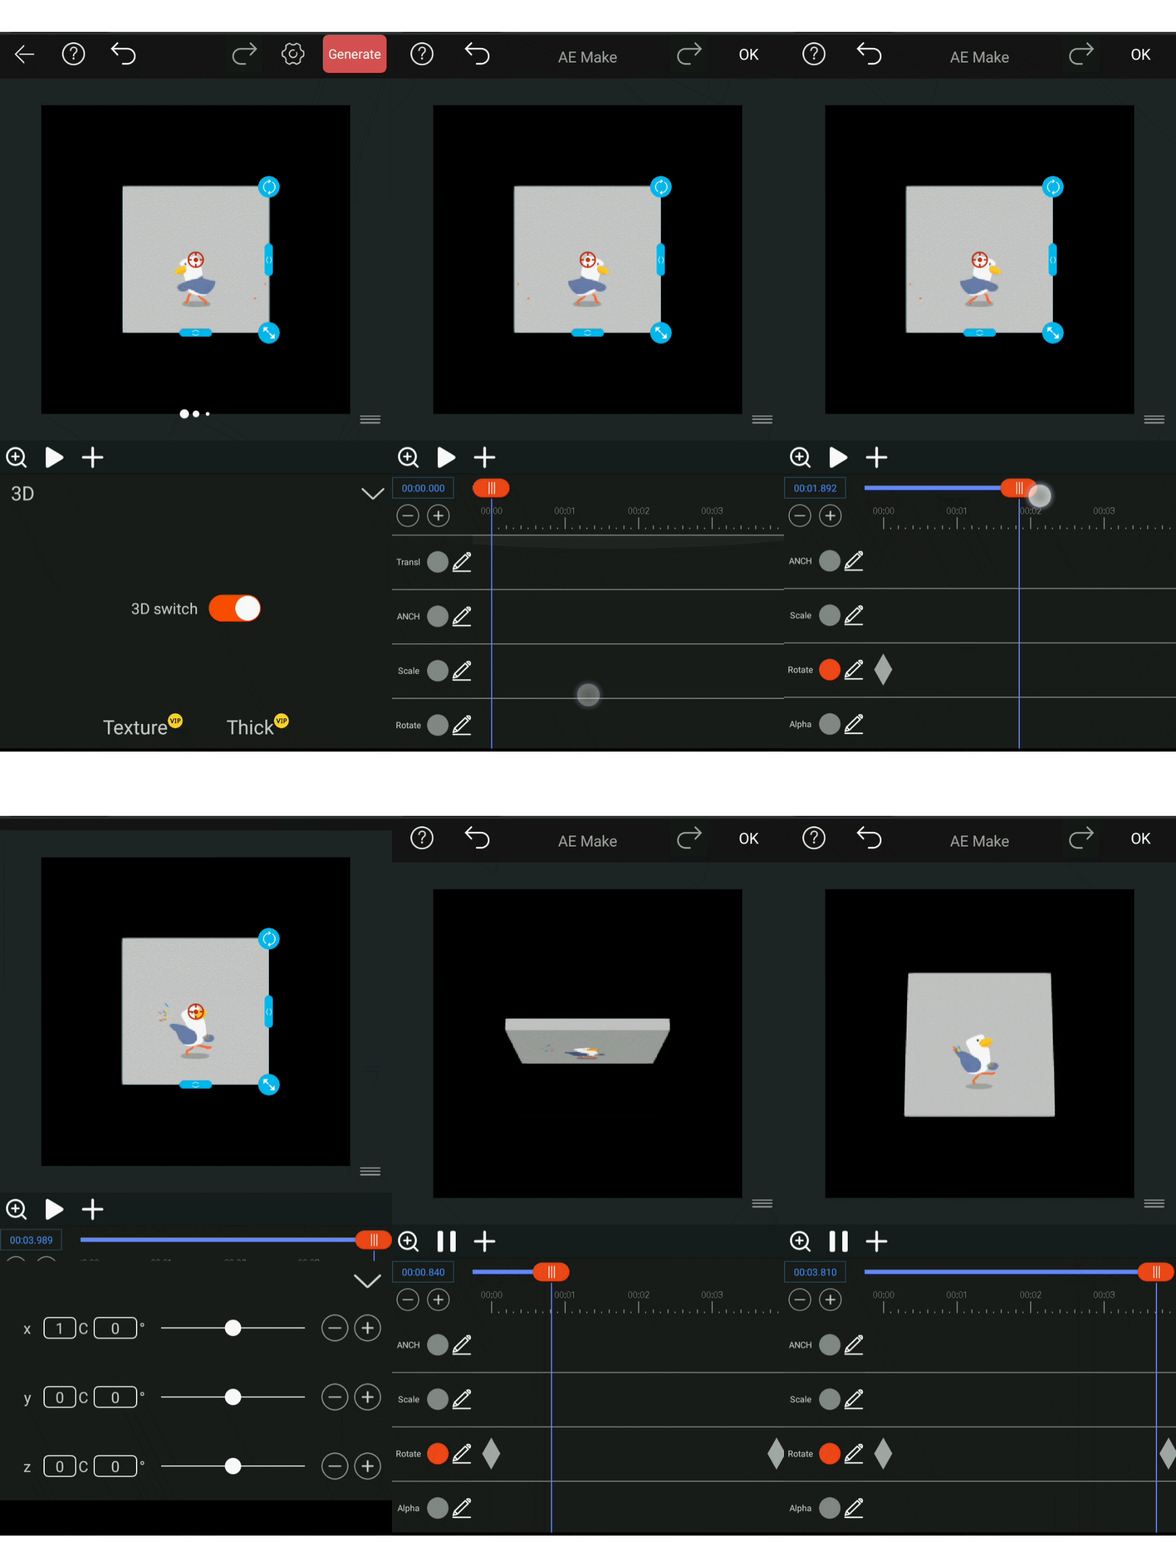
Turn on the transform, select rotation, keep it unchanged at time 0, drag the time frame to 4s, we hit the key frame, and make him rotate the X axis 1 circle.
The tutorial is as follows:
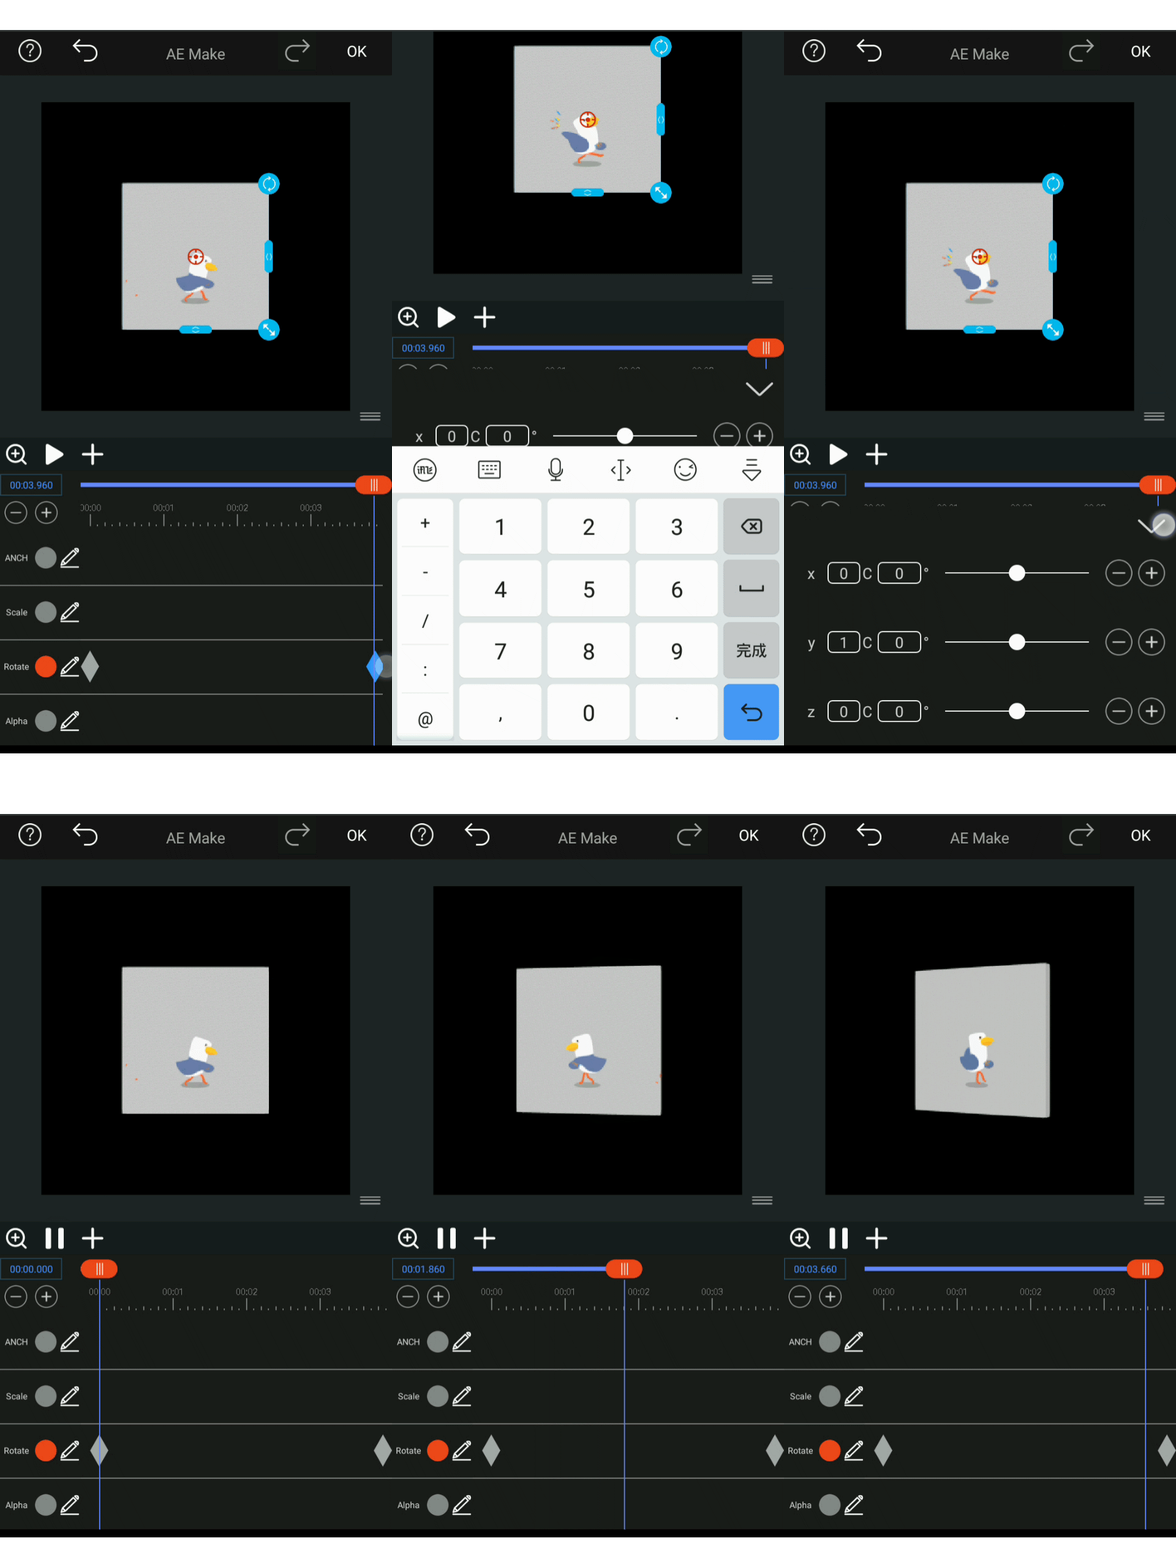
Or we make him rotate with the Y axis (here I clear the x axis data and set it to rotate with the y axis).
The tutorial is as follows:
Let's try another rotation with the Z axis (here I clear the Y axis data and set it to rotate with the Z axis).
The tutorial is as follows:
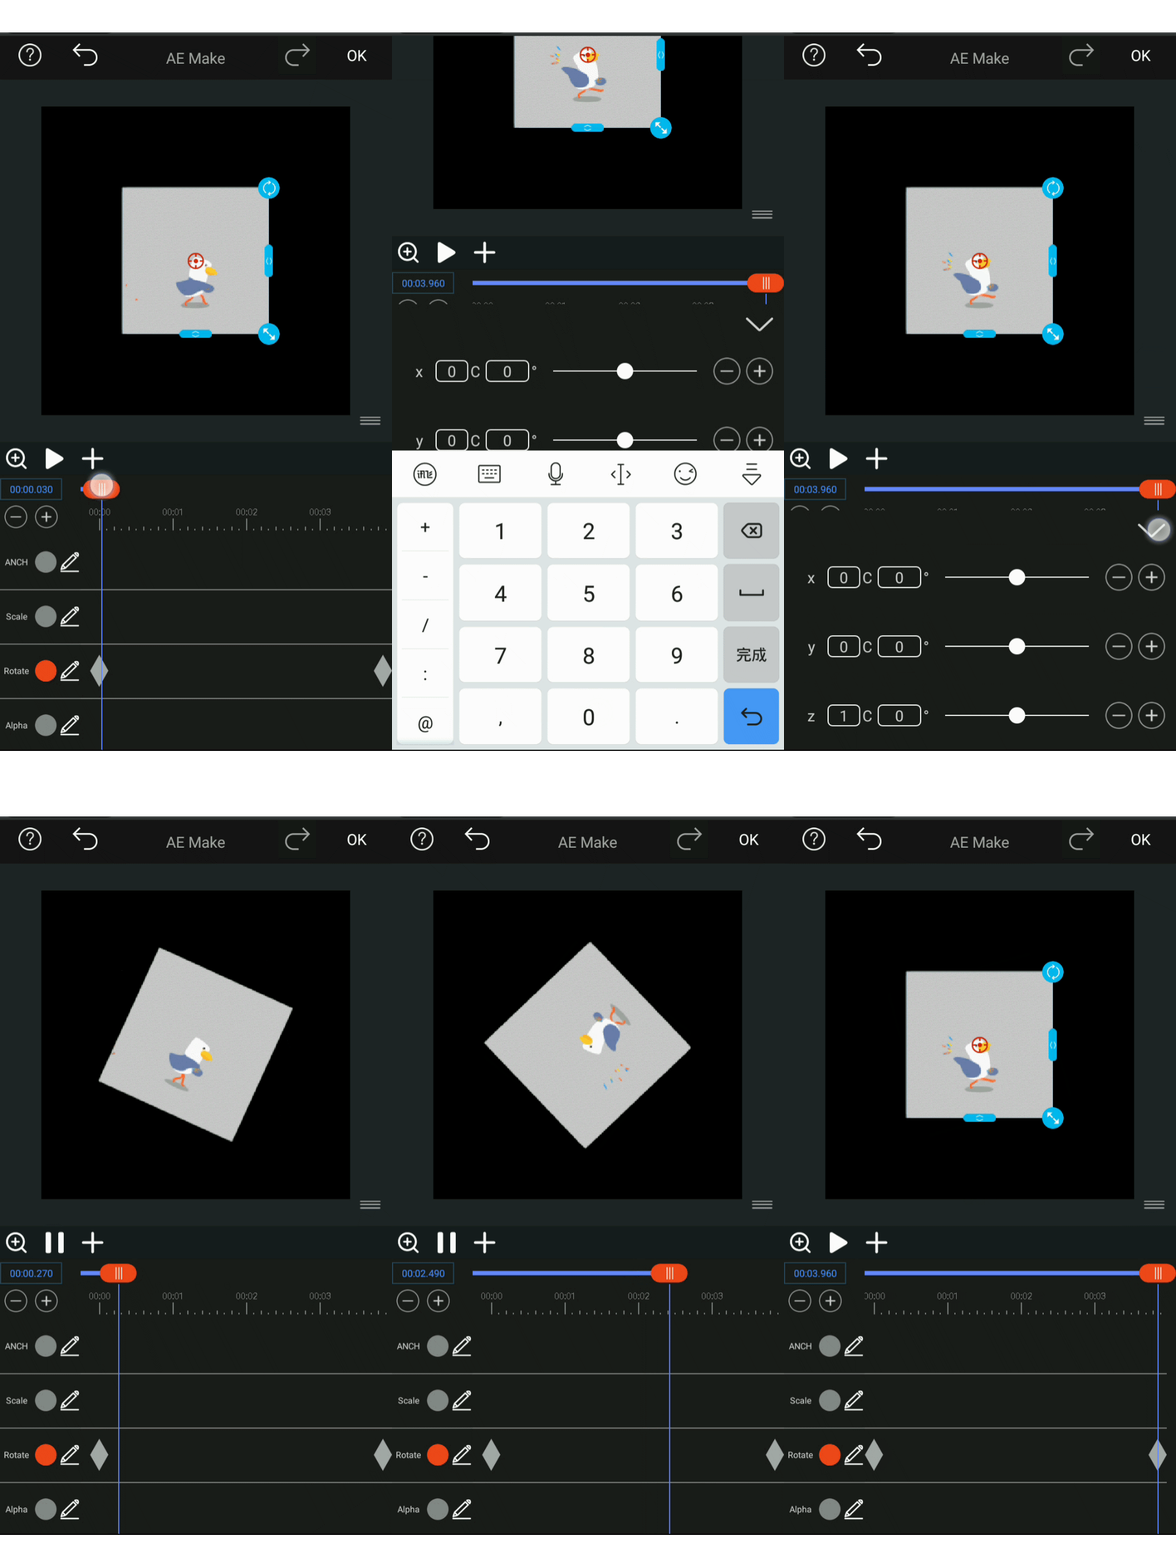
tips: The direction of rotation can be adjusted, the rotation angle is divided into positive and negative numbers, and the rotation direction is opposite in 1 turn and -1 turn.
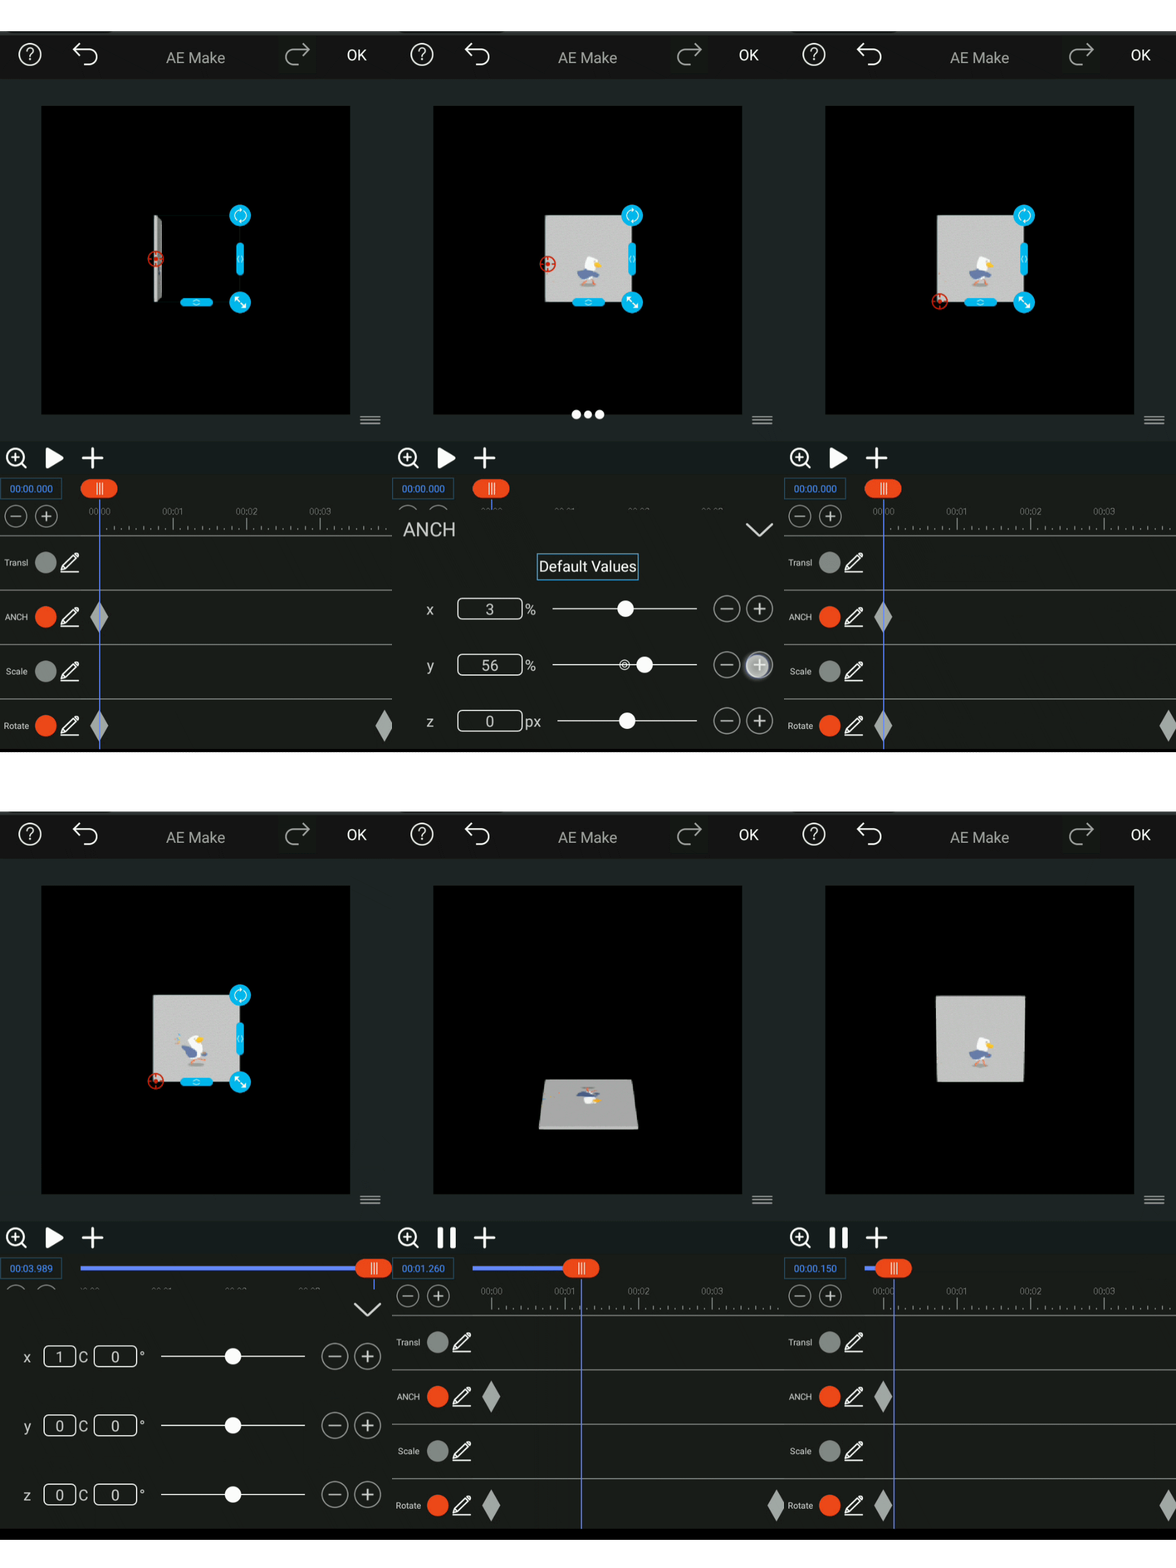
Change center point
The rotation center point described above has not changed. Now let's take a look at what happens to the movement center point.
We first select the center point and try to change its position (here I use the X-axis data to change the center point so that it moves to the measured edge of the picture).
After changing the position, we follow the above method to make it rotate one rotation with the Y axis.
The tutorial is as follows:
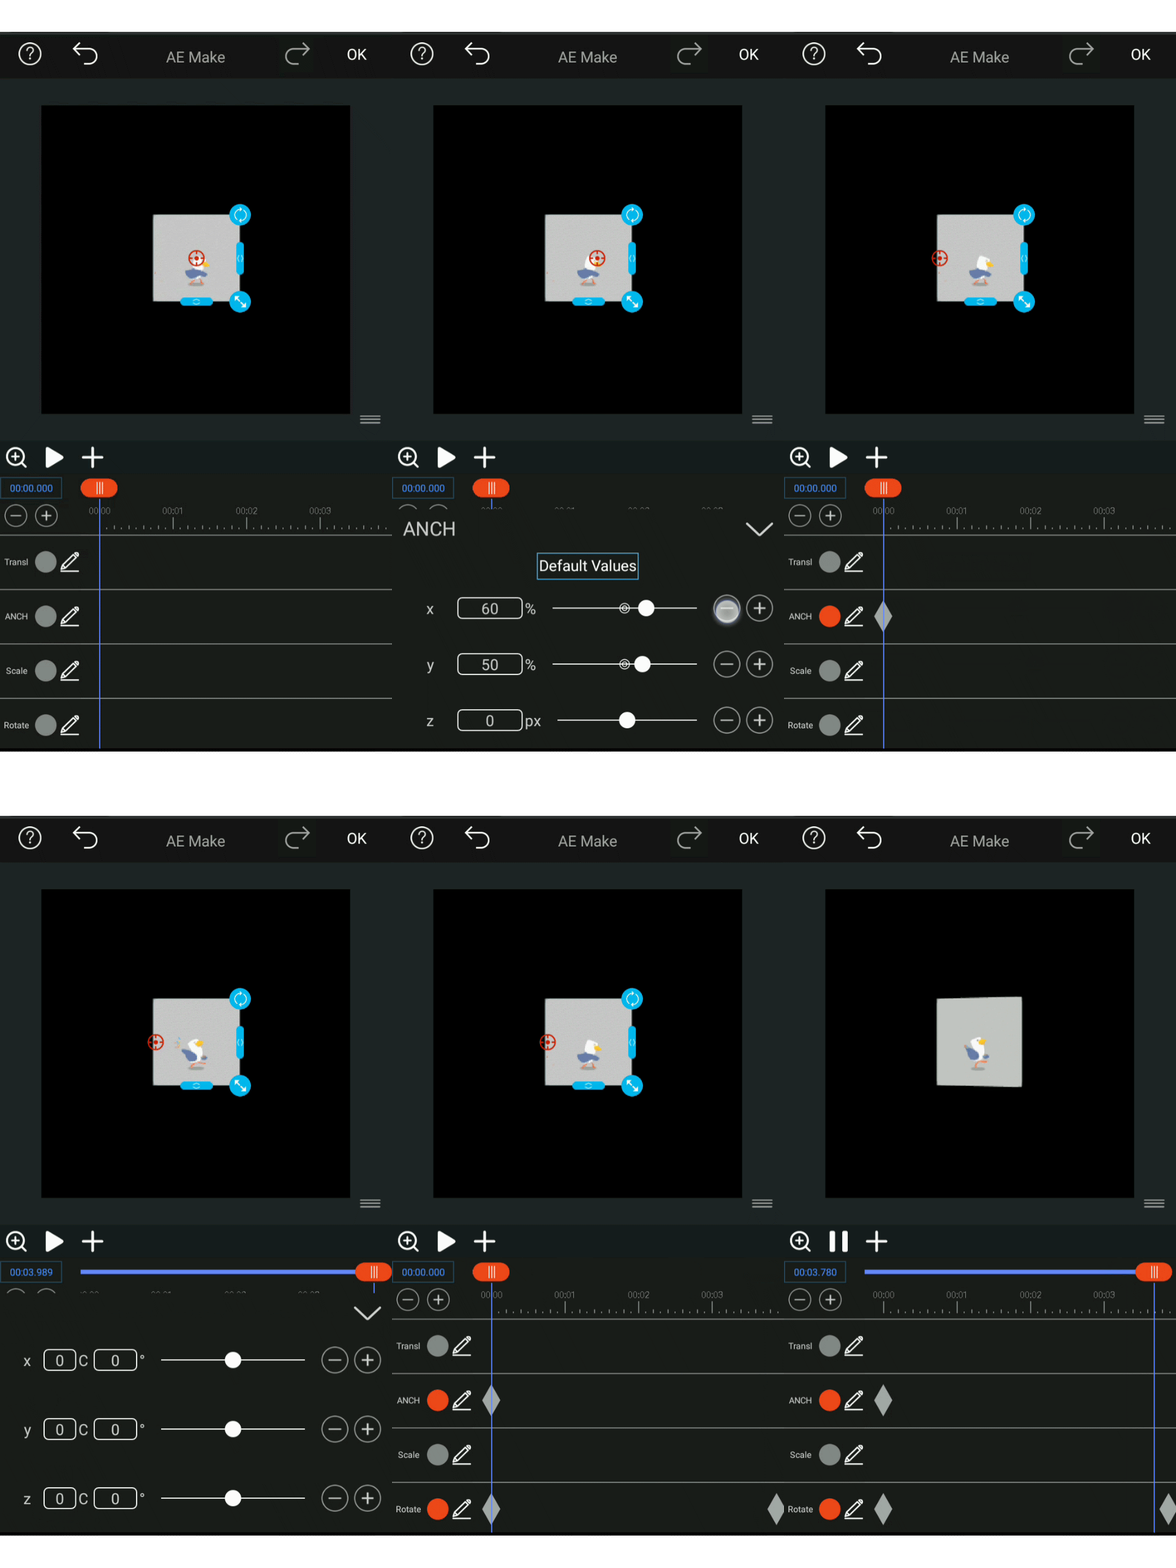
Let's move the center point below the picture and set the X axis to rotate once, the tutorial is as follows:
